Create new Posting Periods
This guide will walk you through the process of creating new Posting Periods for the next fiscal year. This has to be done before you will able to post transactions to the new year.
IMPORTANT
- This should be done in your Test Database first to verify that the Periods are correct before adding them to your Live Database. Posting Periods cannot be deleted after a transaction has been posted to them.
- We recommend locking, at the very minimum, the December sub-period for the new year to prevent accidental postings during the year-end closing process. It can then be set to Unlocked after all postings for the previous year are finished.
Step-by-step guide
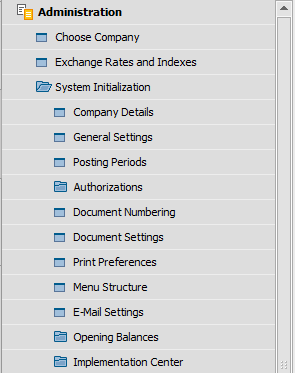
Go to Administration>System Initialization>Posting Periods
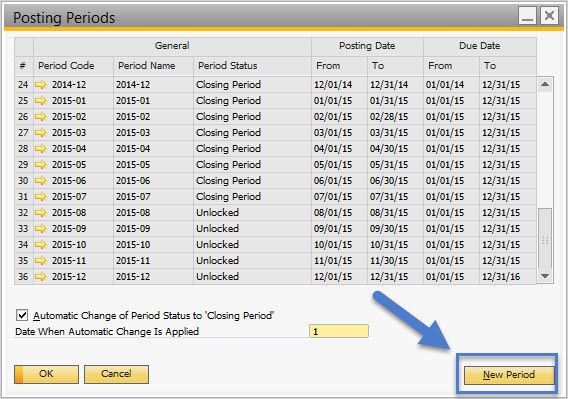
Select "New Period"
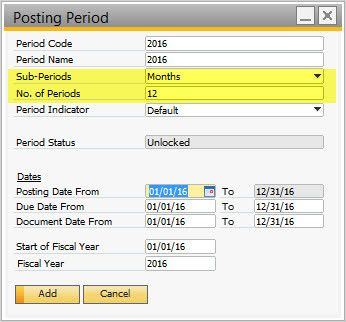
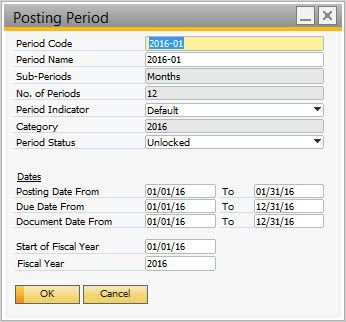
Fill in the information for your new Posting Period NOTE: The Sub-Periods field needs to be set to "Months" and the No. of Periods should be set to 12. These settings CANNOT be changed after adding.
After creating the Fiscal Year, the system will also create 12 monthly sub-periods. You can edit these sub-periods by drilling in to them from the Posting Periods window.
If you do not use standard months, you can edit the starting and ending date for each period
The Period Status can be changed from this same screen
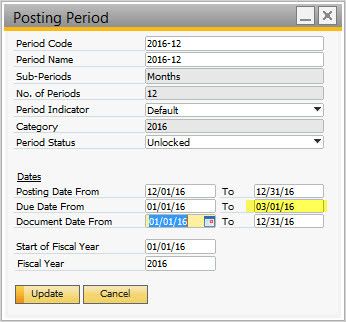
- Drill in to the last 2 periods and extend the Due Date range into the next year
- This will prevent Due Date errors when creating documents at the end of the year that are not due until the next year
- We generally recommend extending them about 2 months into the new year to ensure that the range covers all document due dates