Take Screenshots of a specific window
Screenshots can be very helpful when sending in a Support Ticket to Orchestra. They can be used when you are getting an error message in OBeer, or when you are working on a specific document/report and want to show what is coming up when you try to process it.
Step-by-step guide
For PC Users
Using the Print Screen button on your keyboard will take a screenshot of your entire display, which can make things hard to read if they are only taking up a small portion of the screen. Here are the steps to capture a single window or section of your screen
Open the Start menu in the bottom left corner of your screen. For Windows 8 users, you can press the Windows key+Q
In the search bar, type in "Snipping Tool"
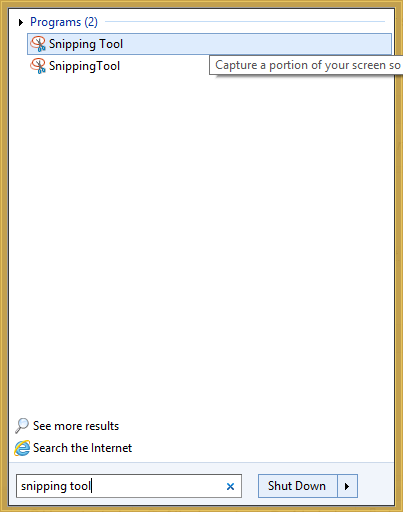
- Open the Snipping Tool
- Click the "New" button
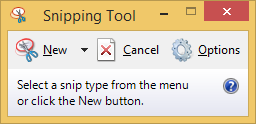
- Click and drag to select a portion of your screen to capture

- You can now save the image to your hard drive, or copy and paste the image into an e-mail
For Mac Users
To capture a section of your screen:
- Press Command (⌘)-Shift-4
- Click and drag to select a portion of your screen to capture
You can hold Shift, Option, or the Space bar while you drag to resize the selection area. To cancel the screen capture, press Escape before you release the mouse button.
To capture a specific window:
- Press Command (⌘)-Shift-4
- Press the Space bar
- Highlight the window that you would like to capture
- Click on the window
The screenshots will automatically be saved to your Desktop. The file will be named "Screenshot (date and time).png". The image can then be attached to an e-mail or ticket to Support.
For iPad Users
Press and hold the power button (on the top of the iPad) and then press the home button (on the front of the iPad, right below the screen). This will save a picture of the screen in your Photos app.