Quick Start: How To Add A New Warehouse
Whenever you get a new warehouse (e.g. fermenter, various tanks, etc.), you'll need to add it into your system and associated with an item before you can use it.
Step-by-step guide
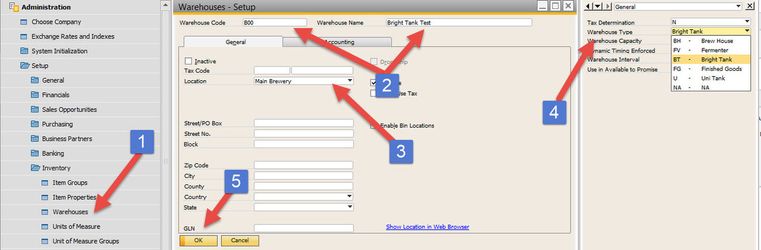
Add a warehouse:
- Go to Administration->Setup->Inventory->Warehouses
- Fill in the Warehouse Code and Name
- Then make sure you associate it with the right Location
- Some reports and modules required you to select the correct Warehouse Type on the User-Defined Fields (press CTRL+Shift+U if you don't see the UDF on the right)
- Once done, click Add
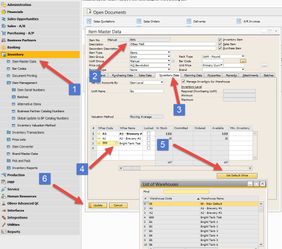
Associate it to an item:
- Go to Inventory->Item Master Data
- Bring up one of your items when in Find mode (CTRL+F)
- Switch to the Inventory Tab and scroll down to the next available row in the Whse Code column
- Press the white circle button to the right, then find your new warehouse in the new window and double-click on it
- If you want to set it as a default, highlight the row and click Set Default Whse
- Click Update
You have now just successfully added your new warehouse.
If you have any problems, take a look to see if you have Authorizations rights to add a warehouse
To associate a large list of items to the warehouse, you can use our Warehouse Assignment Wizard to accomplish this